As you may know, sometimes a straight conversion of a color
image to black and white using the command IMAGE>MODE>GRAYSCALE may
produce less than desirable results. When you are shooting on a beautiful
blue sky day, and you'd like to give your sky a dramatic darkened appearance
popularized by Ansel Adams and his followers, you'll get much better and more
accurate results if you use the channel mixer to control the grayscale conversion
to simulate using a deep red filter.
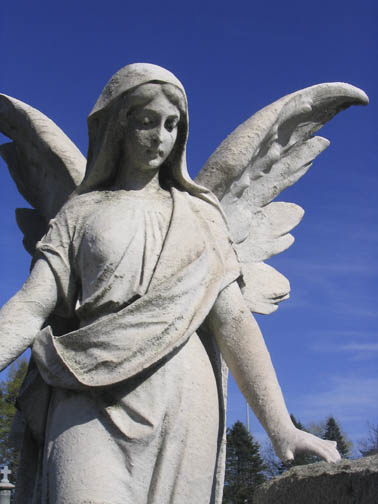
This image was created by Robyn
Thomas as part of an independent study with me to study New England cemetery
statuary. You may right click on it and then left click copy. In photoshop
enter FILE>NEW, OK. Then paste in the picture EDIT>PASTE. Now follow
the tutorial on your own computer.
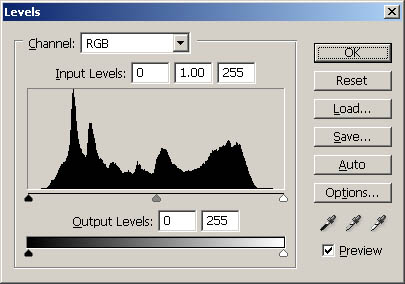
This is the file as it came off her 3 mp camera. Take a look
at the histogram. IMAGE>ADJUSTMENTS>LEVELS (Ctrl-L)
This is a perfect histogram as it shows that all of the exposure
data is away from the far left (blacks) and right (whites). White objects
in full sun are problematic. If the histogram showed a significant amount
of pixels to the far right, we would have to toss this exposure and look for
a better one. Here we have plenty of room to maneuver to create an ideal image.
Here is a straight grayscale conversion of her image... IMAGE>MODE>GRAYSCALE
Not bad, because the blue sky is already a darker value than
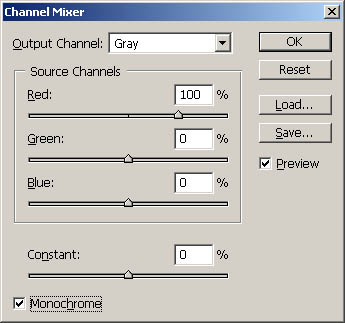
our focal point, but we can do better. Take the original image and try IMAGE>ADJUSTMENT>CHANNEL
MIXER. Here is a screen shot of what you'll see:
Notice that I have set the output channel to gray, and the
source channel to 100% red. Check on the monochrome box in the lower left.
The blue and green channels are at 0%. You may mix these numbers together
to create varying effects but the main rule of thumb is to have the total
amount = 100%. By converting the image to grayscale using 100% of the red
channel, you are in effect doing the same thing as shooting the image with
black and white film with a deep red filter over the lens.
Here is the result of this conversion:
Great... we have a stronger effect in the sky than before...
Now we have to get control over our shadows and highlights and we will have
a strong image. CS has a great new shadow and highlight dialog box. It gives
us refined control over the luminance of the shadows and highlights without
resorting to complicated adjustment layers, selections, problems with levels
and curves, etc.
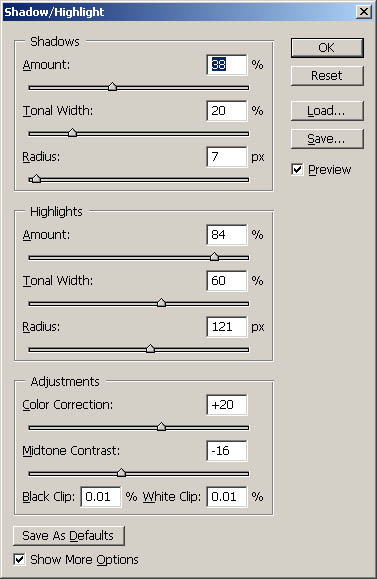
IMAGE>ADJUSTMENT>SHADOW/HIGHLIGHT
Click "show more options"
These are the values I used to get the following version
of Robyn's image.
Now do your final adjustments to the image using feathered
selections using the lasso and the levels dialog box. Remember to set your
black point where you want it in levels.
To review, I converted the original color file using the
channel mixer in order to have a more expressive conversion which mimicked
using a red filter with black and white film for that classic "West Coast
School" look. Then we used shadows/highlights to bring the relationship
of the highlights to the shadows to a much more expressive outcome.