August, 2006
Okay, you now have beautiful images sized in Photoshop to make gorgeous prints on your pigmented ink printer. You want to email them you your gallery or your best friend. You notice as you insert the file into an email, or post it to your web site that it looks HUGE. What happened?
Remember that on paper, the resoulution of your digital file should be generally at least 240 dpi and maybe even 300 dpi.
Your Monitor is a different creature all together! The generally accepted value we use for monitor resolution is 72 dpi... that's right... in one inch there are 72 pixels or discreet image squares that hold all of the value and color information. That means that your 1 inch of resolution on paper appears over 4 inches big on your screen.... You monitor can't display 300 dpi so it uses those pixels and displays them the best way it knows how, one for one... (300 dpi / 72 dpi = 4.16 inches)... Your image sized for an 8x10" print now needs 41.6 inches of screen real-estate (along the 10" dimension) for display... that's a lot of scrolling and a very RUDE thing to do to your best friend or your gallery. By the way the actual resolution your monitor displays can vary up to as much as 90 dpi... your average monitor may be closer to 84 dpi... but old habits die hard... we still use 72 dpi.
What to do?
Consider this screen shot. A roadside importer sells garden statuary along Rt. 7 near my house. One morning I was struck by the Buddah in chains... Here is the original size of my file:
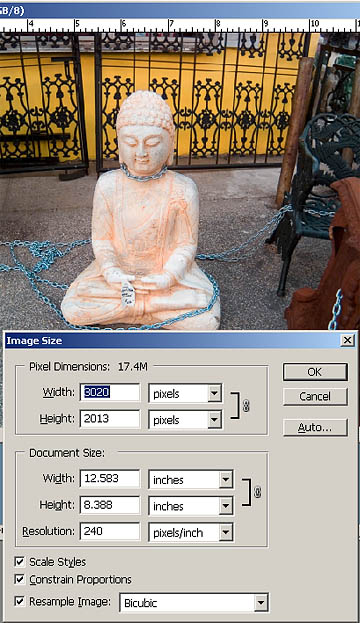
This file is from my 6 mp SLR camera. If I unclick the resample button, I don't add or subtract any pixels, I just rearrange them... so rearranging them to be 72 dpi instead of 240 gives me this:
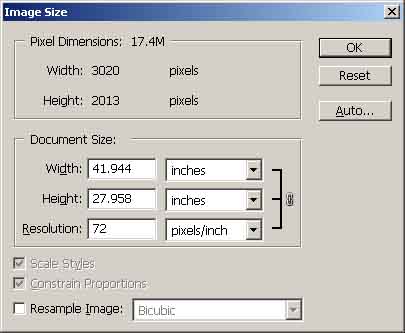
Does your friend have a 42" X 28" computer monitor? Of course not... so It's time to "Resample" the image down to a more manageable size... Click on resample and type in a more reasonable 6" for width... Since the proportions are constrained, the height will change to the right size automatically.
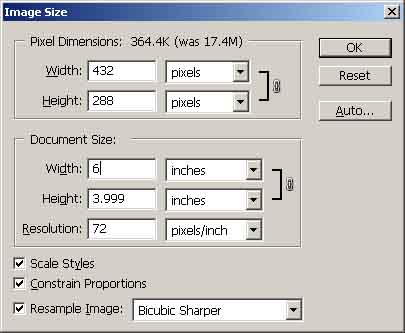
Now the file size is a much more reasonable .3 mp instead of 17.4. It will look perfect on your monitor... just like the original did. Now when it is placed into an email or web page it will display properly and you won't overwhelm the inbox on the recipient's end.
I downsampled this image using "Bicubic Sharper"... a good habit to form when you downsample. The computer doesn't know which pixels it is dumping on it's way to a smaller file so your images tend to get softer than the original unless you downsample using "Bicubic Sharper."
One last thing. Always save the file as a .jpg or .jpeg. This will compress the file even further making for an even faster download on the receiver's email client.
Here is the final screen to consider:
I saved the file as a .jpg... when I clicked "Save As" Photoshop asked what compression level to use:
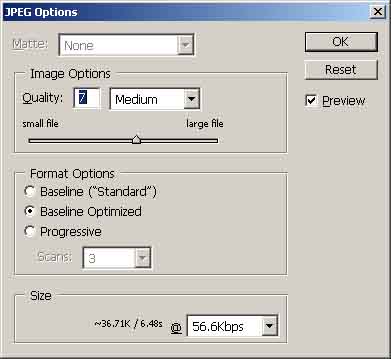
I put the quality slider to "7" and clicked on "Baseline Optimized". Notice the file size is now 31.7k, down by more than 10 times from the uncompressed file at 364k... which is down from the original 17.4 mb file... we are sending about 500 times less data altogether and the image ends up looking the same on your screen as the full size original! Happy posting and emailing!
tutorials|home|photographs|syllabi